 .
.This process will allow a series of DNC codes to be attached to a Status.
1. Go to the “Main Menu” and select .
2. Then select “Codes”.
3. Select “Status”.
4. The screen below will pull up:
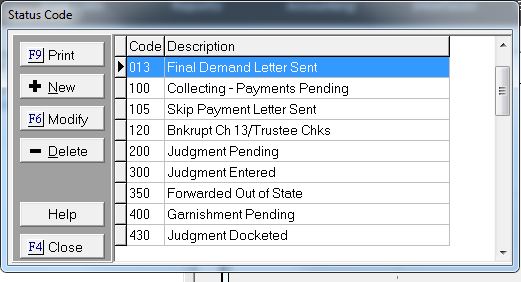
5. This screen will display available status codes.
6. Select any “Status Code” then select the  button.
7. The screen below will pull up:
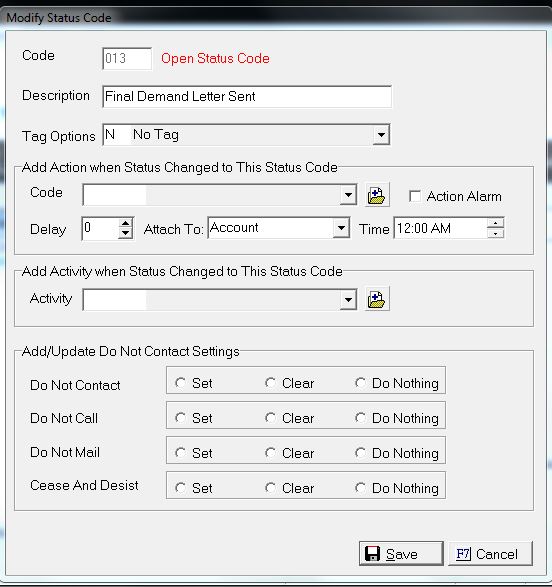

This new feature will allow you to add or clear the following DNC codes automatically: “Do Not Contact”, “Do Not Call”, “Do Not Mail”, “Cease And Desist”. The trigger for these changes occurs when the status changes and if the “Status Code” has any of these selections picked it would update the account automatically.
Things to Remember: By default all Status Codes are set to “Do Nothing”. If you would like to take advantage of the new feature, it will require you to update each status manually
8. Make your selections for the DNC codes by clicking the radio buttons for each option.
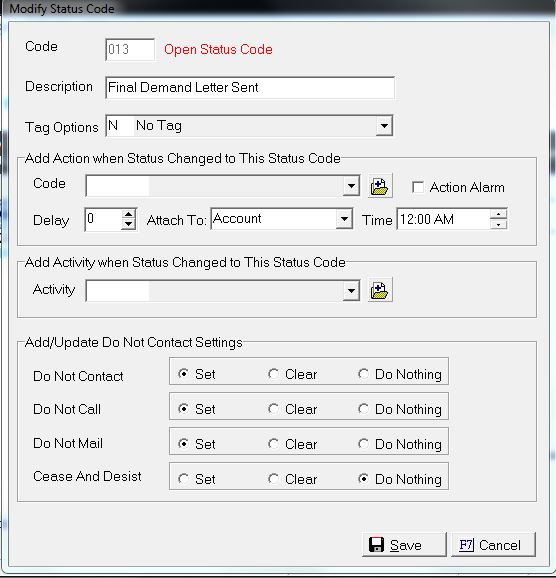
9. Then select the  button.
Things to Remember: You are not required to have any automation attached to your status code.
10. It will return you to the "Status Code Screen", and then you can select the  button.
1. From the "Main Menu", select the  .
.
2. Select your "Consumer Debtor" by using any of our Find by options.
3. Once your"Consumer Debtor" pulls up, click the  button found on your left.
4. Then select the “Modify Status” option.
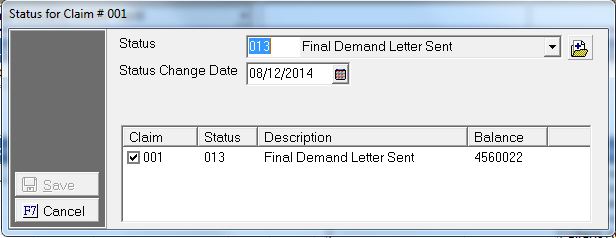
5. The following Screen will show up:

Things To Remember: If you have multiple claims, check the proper claim box before updating your status. Also, if you click the Date
Found in the status section  .
.
6. Use your  drop down button to select your new status.
7. Then click the button to save your changes. The following pop-up will appear.
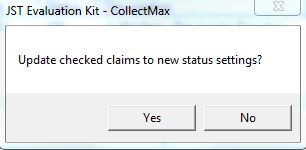
8. Select "Yes", to have the status updated.
9. Your selection will be saved
 .
.
10. To verify that your DNC code selections were added, you should be able to view the DNC codes in the red box to the top right-hand corner. You can also click the  button and then select “Do Not Contact”.
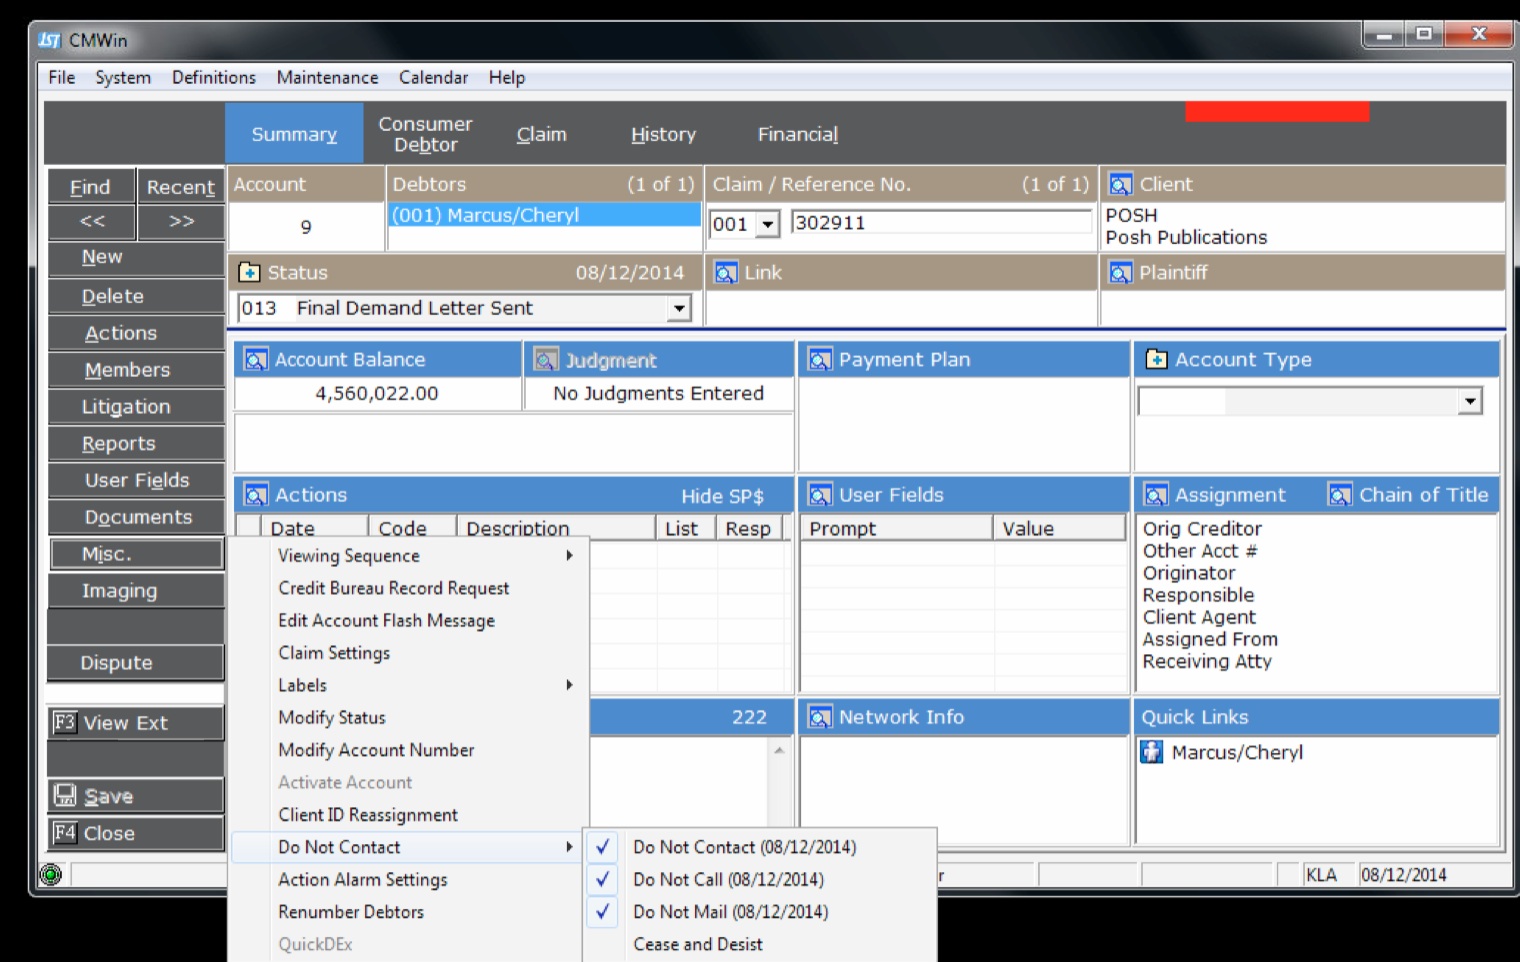
Things to Remember: All of the DNC codes that were added will display a check mark and date. If you selected to clear DNC codes, at this point it would remove the red box on the top right-hand corner and the check mark and the date from all the cleared sections.
Keep in mind: We ignore clearing DNC if “USER Security” is enable to disallow clearing.

11. After reviewing your saved changes, you can click the  button to return to the main menu.
Will this feature work with Batch Processing?
Yes. In the program in the Batch Process section, we have a Mass Account Processing process type called "STATUS CHANGE". This process is designed to Change a Status Code and if you have added the Add or Clear option, it will update all your claims. We also have Document Automation that can be run on individual documents manually or in a Document Batch Process. These processes will add the Add or Clear option if you have added it to the Status Code.